

Let me guess what is holding you back. You have found the top you want, you know your soft top is done, and the only thing between you and a quiet, dry cab is one nervous question. Can I actually put this thing on myself?
Yes. You can. And I am going to walk you through exactly how, start to finish, so the mystery disappears before your top ever ships.
I hear this worry every week on the phone. Folks assume that because we build a serious fiberglass hardtop, bolting one on must take a lift and a weekend of cursing. It does not. Our tops go on in your own driveway, with one helper and a handful of common tools, and most people finish in about an hour.
That said, I am not going to hand you a fairy tale. A hardtop installation is a real job with real steps, and doing them in order is the whole game. Rush it and you can end up with a door that sticks or a seal that whistles on the freeway. Follow the sequence and you get a top that fits like the factory put it there.
So here is the honest, complete guide to your hardtop installation: what you need, how long it takes, the safety rules that matter, and a plain walkthrough of how it goes together.
Is Hardtop Installation Really a DIY Job?
Short answer, yes, for the vast majority of people. A home hardtop installation is well within reach. You do not need to be a mechanic. You do not need a garage full of gear. What you do need is a little patience, a second set of hands, and a willingness to follow the printed instructions in order.
Here is the promise we make and keep: your Rally Top comes with all the hardware needed to complete the installation, and the tops are built to fit your truck like a factory accessory. No fabricating, no drilling into your body panels, no guesswork. The engineering is already done. Your job is assembly, not invention.
What Customers Say About Putting Theirs On
I could tell you it is easy all day long, but you should hear it from owners instead. One Chevy Tracker customer wrote to say it was not hard at all to install and took about an hour with hand tools only. A Jeep Wrangler owner said her top arrived ahead of schedule, undamaged, and was easy to install. A Suzuki owner told us his top was simple to fit and made his truck look exactly the way he had pictured. These are not pro installers. They are regular people with a free afternoon.
When You Might Want a Hand
Honesty time. A few situations make a second opinion worth it. If your vehicle is a two-piece top and you have never handled fiberglass panels, having a friend who is handy nearby helps. If your soft-top hardware is rusted or your body has been modified, things can take longer. And if you are simply not comfortable lifting an awkward, lightweight but bulky panel, there is zero shame in paying a local shop an hour of labor. The point is that hardtop installation is accessible, not that you must go it alone.
Before You Start: Tools, Time, and a Helper
A good hardtop installation is mostly about preparation, not muscle. Get these three things sorted before you lift a single panel and the rest goes smoothly.
The Tools You Will Need
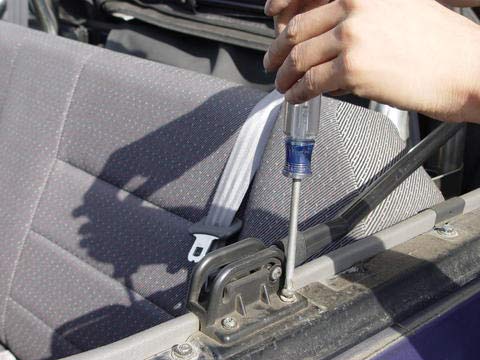
We keep it simple on purpose. No special tools are required for the core installation, and everything you truly need is common garage gear. For most tops that means a basic socket or wrench set and a Phillips screwdriver. On many Jeeps you will also want a tape measure for the windshield check, and if that measurement needs adjusting, a T50 Torx wrench or a set of vise-grips handles the one roll-bar bolt involved. That is genuinely it. If you own a modest toolbox, you are already equipped.
How Long It Takes
Plan on roughly one hour for most installations once you have read the instructions. One-piece tops tend to go quickest. Two-piece removable tops have a few more steps because you are aligning two sections, so give yourself extra time and do not rush the alignment. First-timers should budget a relaxed afternoon rather than squeezing it into a lunch break, so you are never tempted to take shortcuts.
Why You Need a Second Person
This one is not optional, and it is the single most important safety rule in this guide. To safely lift and set the top, you need the assistance of at least one other person. A hardtop is not heavy the way an engine is heavy, but it is large and awkward, and two people lowering it into place protects both you and the finish on your new top. Never try to muscle a top on alone. Grab a friend, promise them a cold drink, and make it a two-person job.
The Golden Rule of Hardtop Installation: Follow the Sequence
Before we get into steps, understand the one principle that makes or breaks the whole thing. Follow the instructions and perform the steps in the given order. Shortcuts to the directions may result in an unsatisfactory installation.
I cannot say this strongly enough. Every step exists for a reason, and many steps set up the step that follows. Tighten something too early and you cannot make an adjustment you need three steps later. The printed instructions that ship in your crate are specific to your exact top, so those are always the final word. This guide shows you the shape of the job so nothing surprises you.
Read the Whole Thing First
Here is a pro habit that pros never skip. Read the entire instruction sheet start to finish before you touch a bolt. Ten minutes of reading saves an hour of backtracking. You will know what is coming, what parts go where, and where the alignment-critical moments are.
Step by Step: How a Rally Top Goes On
Every model is a little different, so think of this as the general road map, not a substitute for your model’s exact sheet. I will use a Jeep Wrangler as the running example because it includes the windshield measurement step that trips people up.

Step 1: Remove Your Old Soft Top
Start by taking off the soft top and its hardware. On most vehicles you will remove the plastic trim around the rear section and any soft-top retainers, while leaving factory pieces like the tailgate molding in place. Keep the bolts you will reuse in a labeled cup so nothing wanders off. Take a couple of phone photos as you go, too, especially of how any trim or door inserts sat before removal. Those pictures are worth their weight in gold if you ever pause the job and come back to it the next day.
Step 2: Do the Pre-Installation Windshield Check (Jeep)
This is the step that separates a tight top from a leaky one on Jeeps, so do not skip it. Put a piece of tape on the top ledge of the windshield and measure. On CJ7 and YJ models the target is 75 and one-eighth inches on both sides. On the Wrangler Unlimited it is 89 and seven-sixteenths inches. If your measurement is off, you loosen the roll-bar bolt (a T50 Torx or vise-grips handles this), have your helper hold the measurement while you adjust, then retighten. When both sides match, your windshield is square and your top will seal evenly. It feels fussy for a step that involves a tape measure, but this is the difference between a silent freeway cruise and an annoying whistle at sixty. Spend the extra five minutes here and you will never think about it again.
Step 3: Dry-Fit and Position the Top
With your helper, lift the top and set it into position without fastening anything yet. This dry fit lets you confirm the top is centered on the windshield and sitting where it should before you commit. On one-piece tops you are checking overall alignment. On two-piece tops you position the rear section first, in the orientation shown in your instructions, then bring in the front. Take a moment to eyeball the gap where the two sections will meet before you fasten anything. A little patience at the dry-fit stage saves a lot of fiddling later.
Step 4: Start the Fasteners Loosely
Now begin installing the bolts, clamps, or camlocks called for by your model, but leave everything loose. This is deliberate. Starting all the hardware before final tightening lets the whole top settle into its best position. On Jeeps you will start flange bolts on the side rails and add side clamps with washers and wing nuts. On Samurai-style tops you engage camlocks into their hooks, which you can screw in or out to dial in a snug fit.
Step 5: Check Your Door Clearance
Here is a make-or-break check on Jeeps and similar models. Before you tighten down, open and close the doors and watch the gap. Too tight and the door seal will drag. Too loose and wind will find its way in. You adjust the fit by nudging the rear of the top forward or back until the doors work cleanly and the seal meets evenly. Get this right now, while everything is still loose.
Step 6: Tighten Everything in Order
Once alignment and door clearance look right, tighten the hardware down in the sequence your sheet specifies. Engage any front clips, tighten the rail bolts, and confirm as you go that the doors still open and close freely. If something shifts, loosen slightly, realign, and tighten again. Patience here is what earns that factory-tight result.
Step 7: Seat the Seals and Weatherstripping
Your top’s seals are what keep the weather out, so give them attention. Follow the sheet for starting and trimming the perimeter gasket and any corner foam and sealant. On many tops there is a specific way to start the rear seal on the flange and trim it to length at the corners. Done right, the seals sit flush and your cab stays dry through a car wash or a downpour.
Step 8: Final Safety Check and Your Keys
Finish with a walk-around. Make sure all brackets and screws are tight. Two keys for the rear lift door usually ride on the inside of the window lock shafts, so locate those. Confirm the rear hatch opens, closes, and locks, and that its gas struts hold it up. Then step back and enjoy the fact that you just installed your own hardtop. Pop the doors on, sit inside, and notice how much quieter it already feels with the panels sealed up. That first quiet moment in the cab is the reward for doing the job right.
Common Hardtop Installation Mistakes (and How to Avoid Them)
After years of answering phones, I can almost predict the handful of snags that trip people up. The good news is that every one of them is easy to sidestep once you know it is coming. Avoid these and your hardtop installation goes from good to flawless.
Skipping the Windshield Measurement
This is the number one cause of leaks and wind noise on Jeeps, and it is completely preventable. People get excited, set the top on, and never check that the windshield is square. Then they wonder why one side seals and the other whistles. Take the two minutes. Measure both sides, adjust if needed, and start the actual install with a square windshield.
Tightening the Hardware Too Soon
I keep hammering on this because it is the mistake I see most. If you snug everything down before you have confirmed alignment and door clearance, you rob yourself of the wiggle room you need. Leave every bolt, clamp, and camlock loose until the top is sitting exactly right. Only then do you tighten, and only in the order your sheet specifies.
Going It Alone
Trying to lift a top solo is how tops get dropped and backs get tweaked. It is a two-person job for a reason. Even if you are strong enough to hoist it, you cannot lift, align, and check position all at once by yourself. Call in that helper before you start, not halfway through when your arms are already shaking.
Ignoring the Dry Fit
Rushing straight to fastening without a proper dry fit is asking for trouble, especially on two-piece tops. The dry fit is your free preview. It shows you how the top sits, where the sections meet, and whether anything needs a nudge, all before you commit a single bolt. Never skip it.
Removing and Reinstalling Your Top Down the Road
One of the best things about a removable hardtop is right there in the name. Once you have done the first hardtop installation, taking the top off for open-air season and putting it back on later is a breeze.
Taking the Top Off
To remove your top, you simply reverse the installation steps. Loosen and remove the hardware in the opposite order, then lift the top off with your helper. On two-piece designs you can often pull just the front section for a quick open-air feel while leaving the rear in place. Store the removed section flat and padded, ideally on a top hoist or against a padded wall, so the finish stays perfect.
Putting It Back On
The second hardtop installation is faster than the first because your vehicle is already set up and you know the routine. The windshield stays squared from your first install, so you skip straight to positioning, checking clearance, and tightening. Most folks can swap a top back on in well under an hour the second time around. Keep all your hardware together in a labeled bag between seasons and the job stays painless.
A Quick Word on Storage
Fiberglass tops are tough, but a little care in storage pays off. Keep the top off the ground, supported evenly, and out of direct sun if you can. Cover it to keep dust off the glass and seals. Treated well between seasons, your top stays showroom-fresh for the next installation and the one after that.
One-Piece vs Two-Piece: How Your Top Affects the Installation
Not every hardtop installation is identical, and the biggest variable is whether your top is a one-piece or a two-piece design. Knowing which you have sets your expectations for the job.
One-Piece Tops
A one-piece top is a single shell that goes on as one unit. The hardtop installation is the most straightforward kind, because there is only one section to align. You dry-fit it, check your clearances, and fasten it down. Many Jeep JK and RAV4 owners are pleasantly surprised at how quickly a one-piece top goes on once the windshield is squared away.
Two-Piece Removable Tops
A two-piece top splits into a front and rear section, which is fantastic for open-air driving later but adds a few steps to the initial install. You position the rear section first, in the exact orientation your instructions show, then bring in the front and join them. Trackers, Samurais, and many TJ setups use this design. The install takes a little longer, but the payoff is being able to pull just the front section on a nice day without removing the whole top.
Which Is Easier to Install?
Both are well within reach for a home hardtop installation. One-piece tops win slightly on speed and simplicity. Two-piece tops ask for a bit more patience during alignment but reward you with versatility down the road. Either way, the same golden rule applies: follow the sequence, keep the hardware loose until alignment is right, and lean on your helper.
Safety Rules You Should Not Ignore
A hardtop installation is straightforward, but a few rules exist for good reason, and skipping them is how people get hurt or damage a beautiful new top.

Always Use Two People to Lift
I said it earlier and I will say it again because it matters most. Lifting and setting the top is a two-person job, every time. It protects your back, your helper, and the finish on your top.
Understand What the Top Is For
Be clear on this. A removable hardtop is designed for added protection against the elements. It is not a roll cage. Do not rely on the top to contain occupants in a crash or to protect against intrusion. Wear your seat belts at all times, exactly as you would with any top. This is the manufacturer’s guidance and it is simply good sense.
Check Your Fasteners Over Time
Installation is not quite the end of the story. It is the owner’s responsibility to periodically check the brackets and screws for tightness and retighten when needed. A quick look every so often keeps everything solid and quiet and gives your top a long, rattle-free life. Think of it like the world’s easiest oil change, only faster.
After Installation: Getting the Most From Your Top
Your hardtop installation is done. Now a few small habits keep your top looking and sealing like new for years.
Give the seals a quick check each season and keep them clean so they keep doing their job. Wash the top with the rest of your vehicle, and a couple coats of automotive wax a year protect the paint against the sun. Recheck those fasteners now and then, especially after your first few weeks of driving and after any off-road trips, since a little settling is normal. That is the whole maintenance routine. For a hardtop this well built, there is not much else to do but drive it.
If something ever does not look right, remember you are not on your own. We build these tops in our own shop and we are always ready to lend expert advice, so a phone call gets you real help from the people who made your top.
Frequently Asked Questions
Most installations take about an hour once you have read the instructions. One-piece tops tend to go fastest, while two-piece removable tops take a little longer because you are aligning two sections. First-timers should give themselves a relaxed afternoon so there is never a reason to rush.
Not much, and no special tools are required. A basic socket or wrench set and a Phillips screwdriver cover most installs. On many Jeeps, add a tape measure for the windshield check, plus a T50 Torx wrench or vise-grips if that measurement needs adjusting. Your Rally Top ships with all the mounting hardware, so you supply only common hand tools.
You should not lift it alone. Safe hardtop installation always requires at least one other person to raise and set the top, because it is large and awkward even though it is not especially heavy. Once it is positioned, one person can handle most of the fastening.
No. Rally Tops hardtops are designed to fit like a factory accessory using existing mounting points and the supplied hardware. There is no drilling into your body panels and no fabricating. The engineering is already done for your specific model.
On Jeeps, a square windshield is what lets the top seal evenly and the doors close cleanly. The pre-installation check (75 and one-eighth inches on CJ7 and YJ, 89 and seven-sixteenths on the Unlimited) makes sure both sides match before the top goes on, which prevents wind noise and leaks later.
That usually means the top needs a small adjustment. Before final tightening, open and close the doors and shift the rear of the top forward or back until the seal meets evenly and the doors work freely. This is exactly why you leave the hardware loose until alignment is confirmed.
Yes, when the seals are seated correctly during installation. Owners routinely report no leaks even after heavy storms and car washes. The perimeter gasket, corner foam, and sealant steps in the instructions are what create that weather-tight fit, so follow them carefully.
Just a little upkeep. Periodically check that the brackets and screws are tight and retighten if needed, especially in the first few weeks and after off-road driving. Keep the seals clean and wax the paint a couple times a year. That is the entire routine.
You Have Got This
A hardtop installation is not the ordeal people imagine. It is a clear, orderly job you can absolutely do in your own driveway with one helper, a few common tools, and an hour or two of unhurried attention. Read the instructions, follow the sequence, take your time on alignment and seals, and you will end up with a top that fits like the factory built it in.
And if you ever hit a snag, we are a phone call away. Ready to put a real roof on your rig? Browse our hardtop lineup or call (800) 664-8677, and we will help you pick the right top and get it on with confidence.